Meiker PSD File Instructions
File Specifications
- Meiker accepts PSD files;
- If you are using a program other than Photoshop to export your PSD, and you are getting an error, upload the file
to www.photopea.com and re-save it from there. We are working on this issue but have found this to be a great
workaround for the time being;
- In GIMP, make sure to select "Export as PSD" rather than "Save as PSD";
- Maximum file height is 1200 pixels, minimum height is 800 pixels;
- File width must be the same as height or less (square or portrait mode).
Basic Labels
- A visible layer, not in any folder, will always be visible (eg. watermark layer);
- Folders labelled [fixed] will only allow one selection from the folder, and one must always be visible (eg.
backgrounds, body);
- Folders labelled [optional] will only allow one selection from the folder, or none (eg. a hat, shoes);
- Folders labelled [mixed] will allow any # of items in the folder to be added at once and mix & matched (eg.
accessories);
- Layers in folders that are visible when uploading will be visible when the game starts.
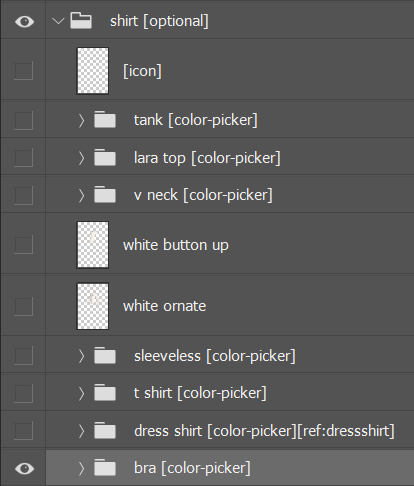
Color Variants (Optional)
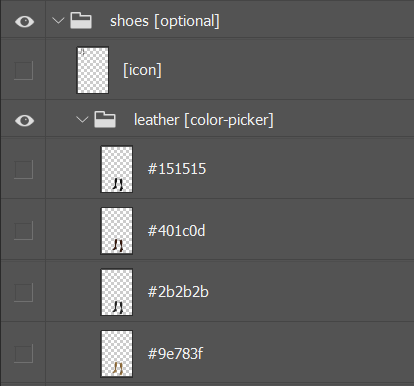
- If you want to make a few color variants of one item (eg. a t-shirt in red, black and white), put all the variants
into one folder;
- Name each layer with the hex code you would like the button in the game to be, eg #000000;
- Put the [color-picker] label on that folder - the hex code will determine the color of the swatch in the menu.
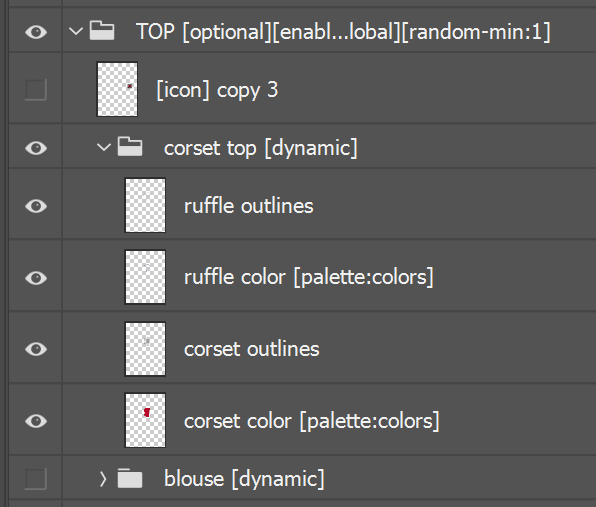
Color Variants (Dynamic - NEW!)
- Separate your item (eg. shirt) into colorable and non-colorable layers.
- Add a [dynamic] label on the item folder (instead of [color-picker]).
- Inside that item folder, leave static layers with no labels (eg. outlines layer).
- Add a palette name on each layer that you would like to add color options to, eg. [palette:insert-palette-name-here]
- Create the corresponding palette on a free layer (outside of any folders) and label it (eg. [local-palette:insert-palette-name-here]. You can create many palettes, and re-use the same palette many times!
- The palettes read the colors from TOP to BOTTOM. Try to make your color swatches roughly the same size as each other or the algorithm might mistake them for stray pixels.
- Non-colorable layers can be used for outlines, other details, highlights, textures or shadows (using Screen, Overlay and Multiply blend modes, respectively).
- To set the starting color of an item, make the colorable layer one of the colors in the respective palette, otherwise the item will default to the first color in the palette.

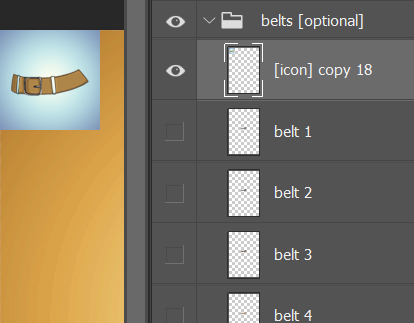
Icons
- You can create an icon for each category by adding a layer labelled [icon] in the respective folder;
- Make an icon in the top-left corner;
- A size of ~100x100px or less is recommended to reduce file size.
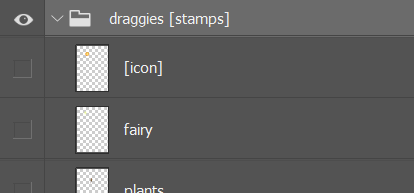
Stamps (Drag and Drop)
- Simply add the [stamps] tag to the parent folder to make every item in that folder draggable;
- Player will be able to “stamp” with the item, adding multiples, dragging, rotating, and resizing each one;
- Does not currently work with color pickers.
Linking Across Layers (Optional)
- YES, you can have an item span MULTIPLE, linked layers!
- This is most useful for the front and back of hairstyles, as well as capes;
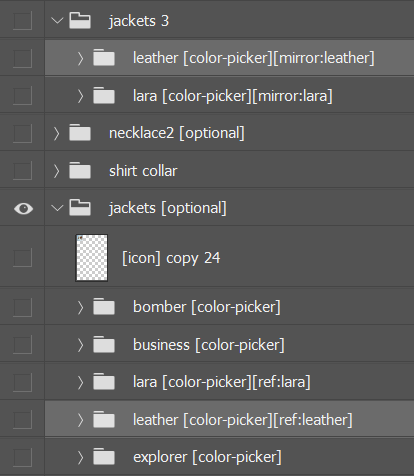
- Each item that will have other item(s) linked to it needs to have a unique reference name on the item, eg
[ref:itemname];
- Each linked item needs to have a mirror label with the identical reference name, eg [mirror:itemname];
- These labels go on the item, not the parent folder. For example, for a folder of hairstyles, each hairstyle will
need its own ref name. If the item has color variants, the label goes alongside the color-picker, for example:
hairstyle 1 [color-picker][ref:topbangs];
- ICON: the folder with mirrors does NOT need its own icon in the folder, nor labels (eg. [fixed]), but the
individual mirror folders do need to specify [color-picker] if there is one there;
- The item specified as the "ref" will be what shows up in the menu, so choose wisely;
- Each ref can have multiple mirrors, if needed.
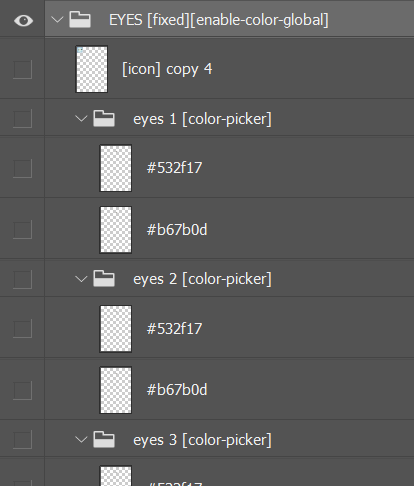
Have All Colors Change Together (Optional)
- If all the items in a folder have the exact same color variants, you might want the color of all of them to change
at once;
- Simply specify [enable-color-global] in the parent folder;
- This works well for things like hair or eye colors. It's not great for shirts where each type of shirt comes in a
unique selection of colors.
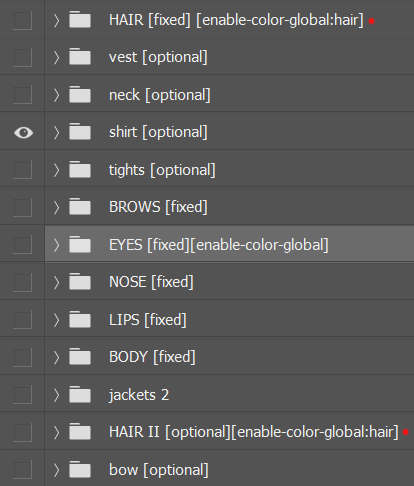
Link Enable-Color-Global (Advanced)
- Sometimes you want colors to change together in multiple categories at once;
- You can add a specific label to enable-color-global: eg. [enable-color-global:hair];
- Place this on all folders that you want linked, with the same tag (eg. "hair");
- For example, you might have bang and ponytail styles that are mixable. But you still want all hair colors changing
together. Simply put the above label on both the ponytail folder and the bangs folder.
Move
- Simply add the tag to the item: [move: 10 10 10 10], where the numbers represent the number of pixels the item can be moved top, right, bottom and left;
- For example, to allow a nose to move ten pixels up or down (but not sideways), add the tag [move:10 0 10 0].
Random Start (Advanced)
- It's recommended (but not required) to start the doll on randomized features;
- For [fixed] items only, if you upload the PSD with NO LAYERS being visible, the program will pick a random one to
be visible each time;
- This works well for things like skin tones, eye colors, hairstyles.
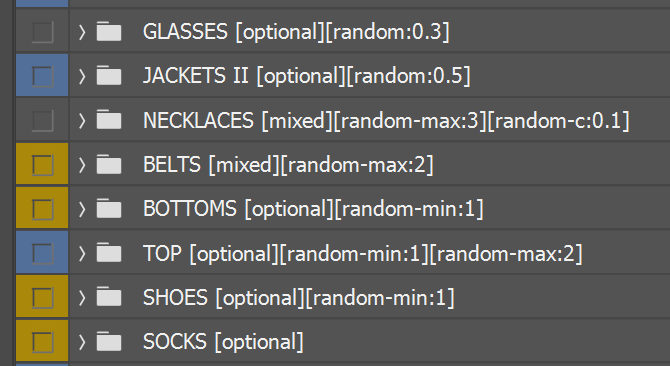
Randomizer Control (Advanced)
- You can put [random-min:1] on [optional] folders, to force the randomizer to ALWAYS select one item from that category. This works well for shirt and pant folders, to make sure that the doll is always dressed.
- You can put [random-max:1] on [mixed] folders, to make sure they don't place more than one item at a time, to keep things from getting cluttered.
- You can put [random:0] on an ITEM or CATEGORY to prevent it from being chosen at all. Please note, you cannot put [random:0] on a color variant.
- You can read more about randomization options here: https://wiki.meiker.info/view/Random
Custom Skin Tone Buttons & Custom Icons (Advanced)
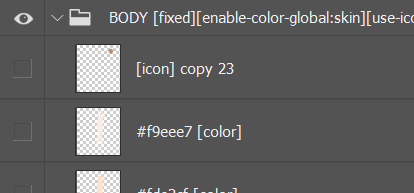
To move skin tone buttons into the main menu (from a color picker) without losing Enable Color Global:
- In the main skin tone folder, use hex codes on individual skin colors, but do not nest inside a [color-picker] folder. Instead, have the layers in the main Body folder, and add [color] to every layer, to indicate that this is a special case. Eg. #f9ee7 [color].
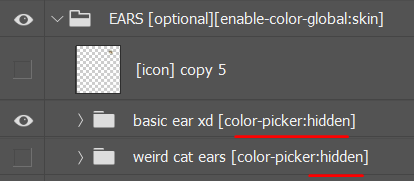
To hide color pickers (eg. for other linked body parts):
- In folders that are linked using enable-color-global, simply replace the [color-picker] tag with [color-picker:hidden]. These folders will still listen to the linked color pickers but the color picker won’t pop up when choosing these particular items. This is useful for ears or hands or other items that already have a place to toggle the main color elsewhere;
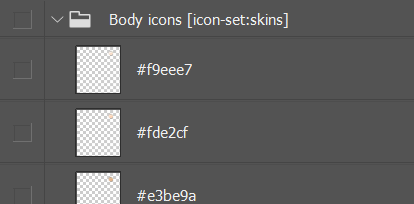
- To use a custom icon set (eg. if skin tones are nude because underwear is dynamic), first add the [use-icon:X] tag to the body folder, X being the name of your choice;
- Create a new folder anywhere in the file, adding the tag [icon-set:X], X being the same name as in the previous step.
Tips
- Name all your layers and items logically, so when you get errors upon uploading, you can easily track down the
layer needed;
- If you have color variants, don't place the super dark colors last, as the button might be hard to see on a back
background, if the game is narrow;
- If you have white/faint items, don't place them at the end in the folder as they might be hard to see in the menu.
If darker colors come after them, it will be obvious to the player that something is there and can be clicked on.
The system adds a slight drop shadow to all items but it can still be hard to see some pale items, especially if
they're faint.
Common Errors
- The system only supports 2 layers of folder nesting: the parent folder, and folders of color pickers inside. If
you have things three folders deep, it will generate errors (eg. "Clothes" folder, with a "shirts" folder which has
"color picker" folders);
- If an item or icon appears oddly small in the menu in the final game, there are likely stray pixels somewhere on
that layer. Simply select the area you want, copy/paste it to a new layer and delete the old layer;
- Just like real programming (because this is real programming!), everything between the square brackets must be
spelled completely correctly.
If you have any questions, please do not hesitate to reach out to Ola at [email protected]